Authentication
How it works
You must be a verified MRI OnLocation user to make API requests. This is an SSL-only API and supports multiple authentication methods.
Supported authentication methods:
- API key authentication (legacy, still supported)
- OAuth 2.0 client credentials (recommended for machine-to-machine integrations)
For API key authentication, you can use either an authentication header or basic authentication.
Example header with API key
The authentication header contains the word APIKEY followed by a space and the API key in plaintext.
  curl -i -X POST \
    https://api.whosonlocation.com/v1/location \
    -H 'Content-Type: application/json' \
    -H 'Authorization: APIKEY abcdef1234567890' \
Basic authentication example
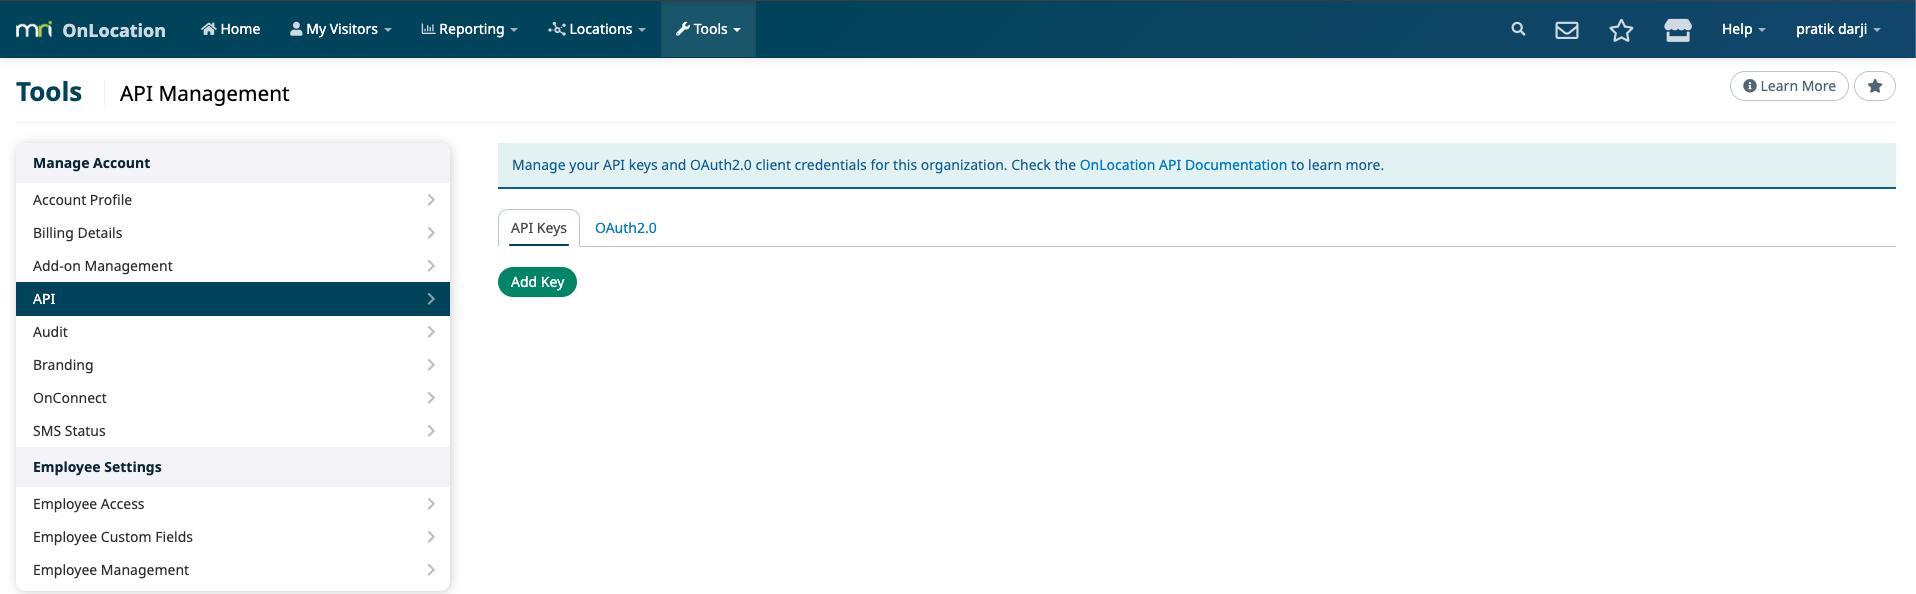
curl -u abcdef1234567890: https://api.whosonlocation.com/v1/staffManage your keys in the API Management screen in OnLocation. API keys can be restricted to the following data:
- Unrestricted
- Locations/Access Points/Departments
- Notifications
- Certifications
- Contractors
- Staff (employees)
- Visitors
Add an API key
You must have the Account Owner or IT Support user role to access to add an API key.
- Log in to OnLocation.
- Go to Tools > Account.
- Select API from the menu on the left.
- Click Add Key.
- Select any access restrictions.
- Accept the Application Developer and API Agreement, then click Generate Key.
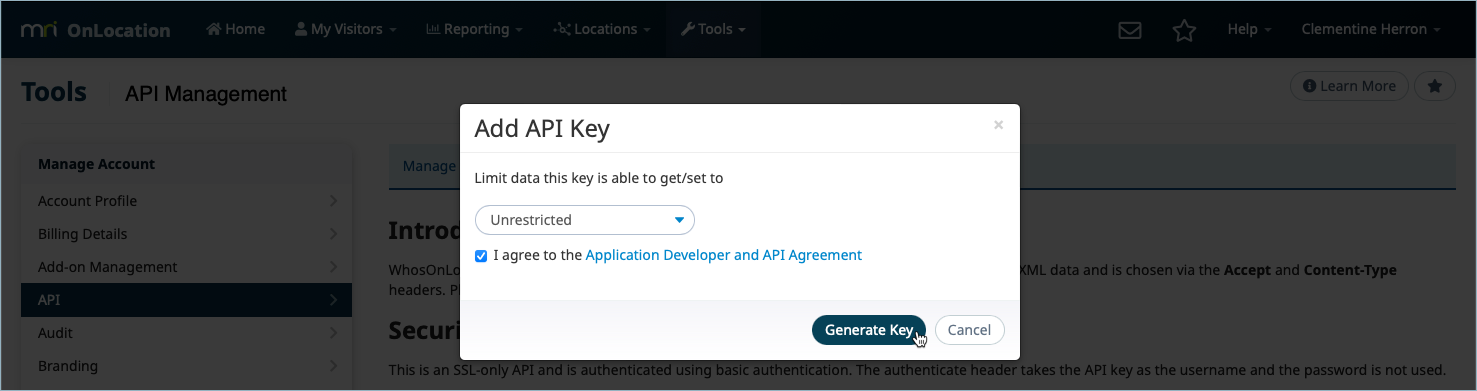
- Click Close this Message.
To add another key, click Add Another on the API Management screen.
Remove a key
You must have the Account Owner or IT Support user role to add an API key.
- Log in to OnLocation.
- Go to Tools > Account.
- Select API from the menu on the left.
- Click Remove next to the API Key.
- Click Remove to confirm.
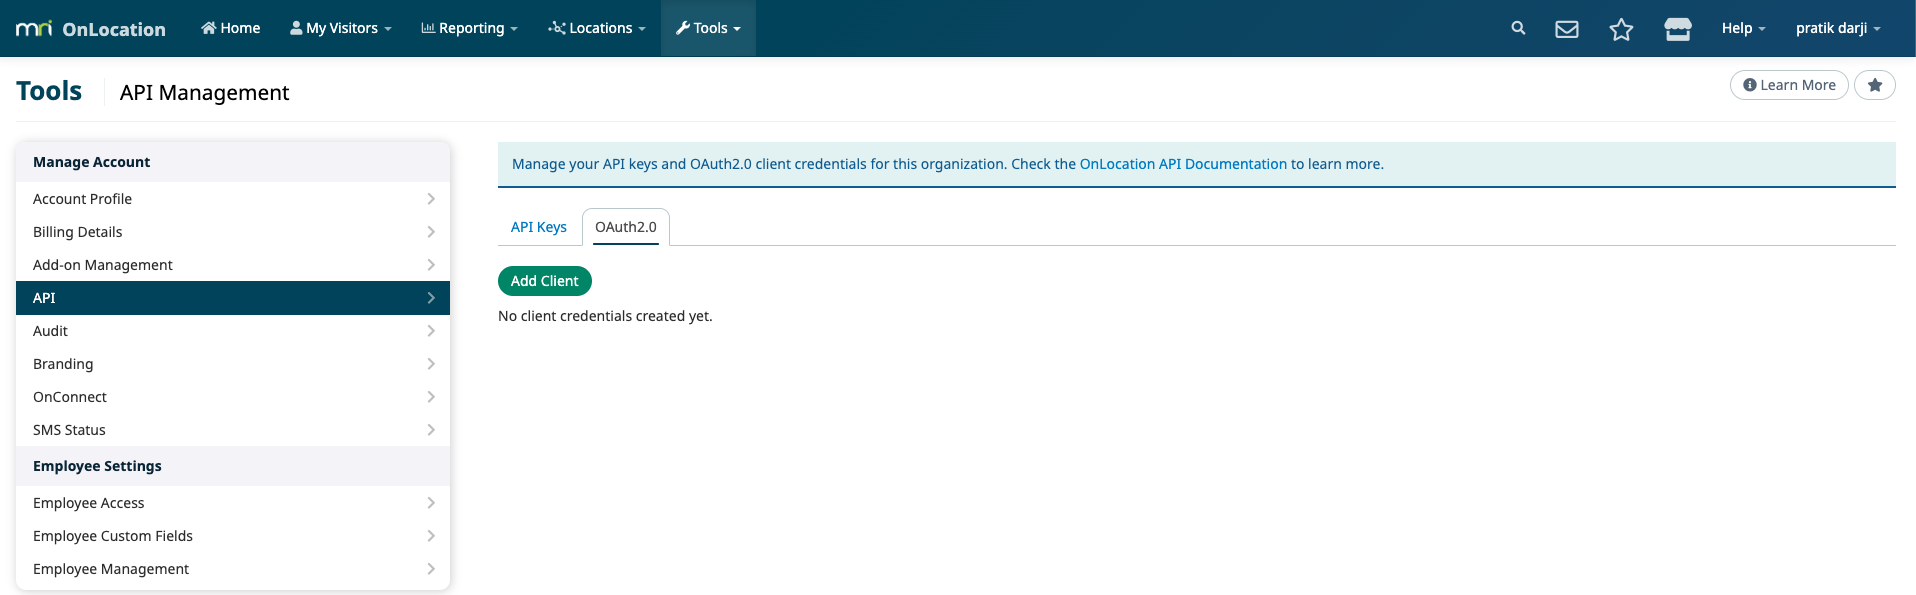
Add an OAuth2.0 client credential
You must have the Account Owner or IT Support user role to add an OAuth2.0 client credential.
- Log in to OnLocation.
- Go to Tools > Account.
- Select API from the menu on the left.
- In the OAuth2.0 section, click Add Client.
- Enter a client name.
- Select at least one scope.
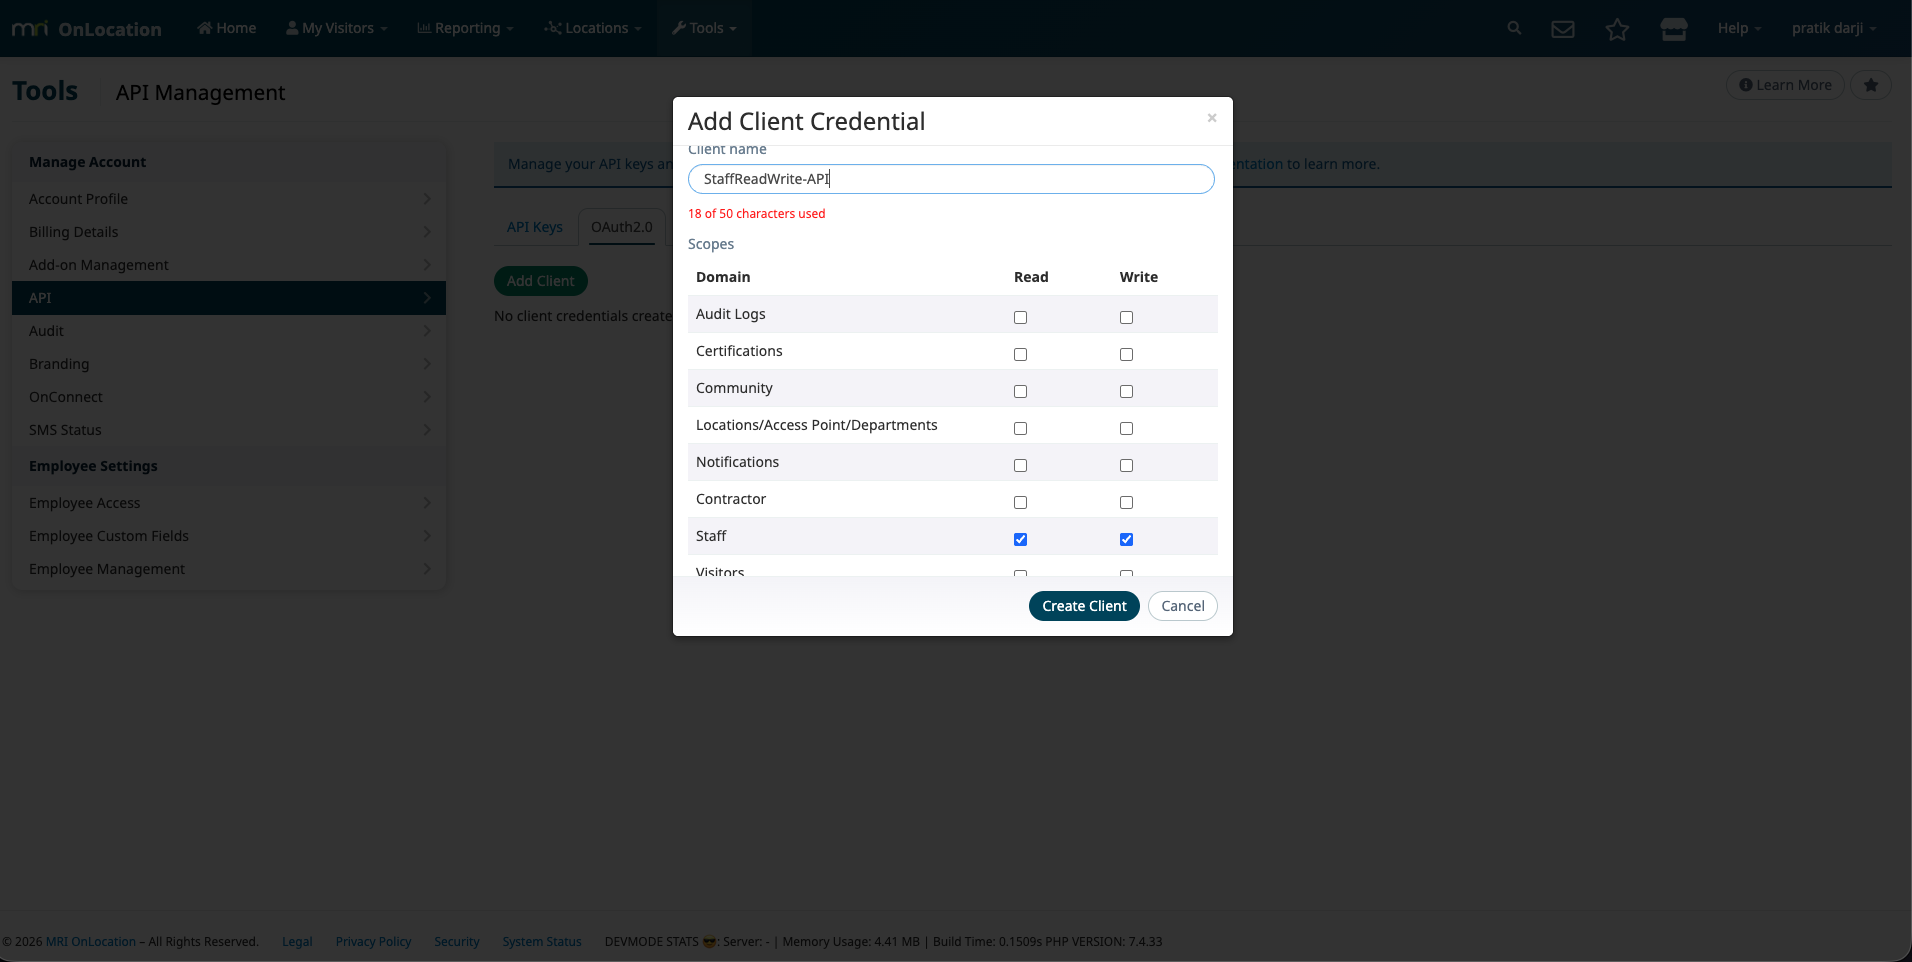
- Click Create.
Copy the client secret when it is shown. For security, the secret is only displayed once.
OAuth2.0 client credentials (Bearer token)
The OAuth 2.0 client credentials flow is intended for system-to-system integrations.
Workflow:
- Create an OAuth2.0 client credential (client ID + secret)
- Exchange the client ID + secret for an access token
- Call the API with
Authorization: Bearer <access_token>
Get an access token
Request an access token from the token endpoint:
- Token endpoint:
POST https://login.whosonlocation.com/oauth2/token - Grant type:
client_credentials
Example (using HTTP Basic for client authentication):
curl -sS -X POST 'https://login.whosonlocation.com/oauth2/token' \
  -u '<client_id>:<client_secret>' \
  -H 'Content-Type: application/x-www-form-urlencoded' \
  --data-urlencode 'grant_type=client_credentials' \
  --data-urlencode 'scope=visitor:read staff:read'
Example response:
{
  "access_token": "<jwt>",
  "token_type": "Bearer",
  "expires_in": 3600,
  "refresh_token": "<refresh_token>",
  "scope": "visitor:read staff:read"
}
Regenerate an access token using the refresh token
The token response also includes a refresh_token. You can use this to request a new access_token without switching back to the client_credentials grant.
- Token endpoint:
POST https://login.whosonlocation.com/oauth2/token - Grant type:
refresh_token
Example:
curl -sS -X POST 'https://login.whosonlocation.com/oauth2/token' \
  -u '<client_id>:<client_secret>' \
  -H 'Content-Type: application/x-www-form-urlencoded' \
  --data-urlencode 'grant_type=refresh_token' \
  --data-urlencode 'refresh_token=<refresh_token>' \
  --data-urlencode 'scope=visitor:read staff:read'
Example response:
{
  "access_token": "<jwt>",
  "token_type": "Bearer",
  "expires_in": 3600,
  "refresh_token": "<refresh_token>",
  "scope": "visitor:read staff:read"
}
Notes:
- Client authentication is still required (use the same
client_id/client_secret). - If you include
scope, it must be a subset of the scopes configured on the client. - Treat the
refresh_tokenas a secret (store it securely).
Rotate secret, revoke, and delete
You can manage OAuth2.0 clients from the API Management screen in OnLocation.
- Rotate secret: Generates a new client secret (shown once). Existing access tokens will be rejected and you must request a new access token using the new secret.
- Revoke: Disables the client. Token requests will fail and existing access tokens stop working.
- Delete: Permanently deletes the client.
Call the API using the access token
Use the returned access token as a Bearer token:
curl -sS -X GET 'https://api.whosonlocation.com/v1/staff?limit=10' \
  -H 'Accept: application/json' \
  -H 'Authorization: Bearer <access_token>'
Scopes
OAuth2.0 scopes are space-separated and use the format domain:read and domain:write.
- Use
:readscopes for read-only operations (typicallyGET) - Use
:writescopes for write operations (typicallyPOST,PUT,DELETE)
The token request scope (if provided) must be a subset of the scopes configured on the OAuth2.0 client.